–Originally published at FlippedClassroomWorkshop.com
SMART Recorder + Windows Movie Maker = A Solid Flipped Lesson Tool Set!
Much thanks to the fine educators at the Saranac Lake School District in upstate New York that participated in the full day flipped classroom workshop we ran last week. It’s always such a pleasure to work with passionate teachers, administrators, and technologists (which reminds me … thanks again to tech guru Seth Putnam, who made everything run smoothly!).
During our session, we worked together to consider the tools that would be the most readily available and logical to use for creating flipped content given the technologies they already have access to. I do share a good number of free online tools in my workshop, some require installation, and they all require learning. Additionally, screencasting can require gaining additional comfort with other hardware and software. It always makes sense to seek the solution that is easiest and most effective … to look for tools that are already in place.
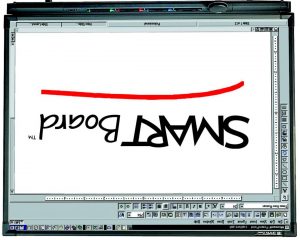
As it turns out, Saranac has SMART boards in many classrooms (as do many schools across the U.S.). SMART boards come with the SMART Recorder, which allows you to record what is being done on the SMART board, along with the presenter’s voice (via the attached computer).
Teachers who are used to using the SMART boards to bring up content, and may draw, highlight, and use other SMART board features to lecture will find using the SMART Recorder a snap. They just need to think a little about how best to capture audio.
Capturing Good Quality Audio
Studies have shown that people have far less tolerance for poor quality audio than they do for low quality video. So you want to make sure you are capturing good quality audio. Given the fact that the audio in our proposed solution will be captured from whatever mic is present on the computer connected to the SMART board, one additional tool that can help ensure good quality audio is a USB microphone or a regular audio mic if one is available. Decent USB mics can be had for $20 to $40 (here’s one that comes with a simple stand for $22.99).
If the connected computer is a desktop PC with no microphone, well obviously this is essential, but even with a connected laptop, using the internal mic may not yield good sound … it still makes sense to get a mic with a cord, so it can be placed closer to the teacher as he or she works at the SMART board. Teachers should experiment with the placement of the mic to achieve the best sound quality. You may want to try and elevate the mic (a mic stand can help if there is one around you can borrow – or maybe consider a ‘boom’ arm like this one for $13.50).
Easy Editing – Windows Movie Maker
The next part of the formula is editing – the SMART Recorder just records – turn it on and it records until you turn it off. There is no editing capability. If you are using a Windows based PC, you may have Windows Movie Maker built in and available already. If it isn’t already installed, you or a tech can download it for free here. (Of course, the Mac has great built in video editing tools as well.)
Windows Movie Maker is an easy to use tool that can allow you to cut and clip videos (as well as assemble multiple clips into one), add overlays of text, highlights, transitions, and more. This provides an easy way to polish your SMART board recording and produce the final video for your lessons.
One caveat is that Microsoft may be moving away from support of the Movie Maker platform, but in the meanwhile, it is still a viable option for many existing Windows based computers. [Note to Windows 10 users: Movie Maker does not come with Windows 10. I downloaded the Windows Essential 2012 suite and it seemed to install fine, but I couldn’t find Movie Maker afterwards to open and use. Not sure what the deal is with that, but I’ll add more here if I figure it out.]
Movie Maker will output your file in the WMV format, which works on Windows computers, and can be uploaded to YouTube. By uploading it to YouTube, you can then leverage the many different types of tools that can help to ensure student engagement with the content (like ed.ted.com or EdPuzzle).
If you need your file in a different format, like the more commonplace MP4 format, you will need to convert it. One way to do this is upload it to YouTube then download is as an MP4. There are many other ways to accomplish this as well.
So there you have it – two applications that can enable you to create flipped content with relative ease, if you already have access to a SMART board. I didn’t have much time to kick the tires on this process, and don’t regularly have access to a SMART board, so if you try this and have any insights or tips to offer, please be sure to drop a comment and share!
If you are Using Another Brand of Interactive White Board
You can also leverage this concept with other IWBs, using one of these approaches:
- Find out if the manufacturer of the white board you use has a recording application (many do).
- Try an online interactive whiteboard that will allow you to record your session, like PixiClip (disclaimer: I haven’t use this app but I see it in this post on Richard Byrne’s site so it comes recommended).
If anyone knows any other online IWB’s that let you record your session, please advise! Thanks!
*(Unflipped Image Source)


[…] An Easy Way to Create Flipped Lessons if you Have a SMART Board https://flippedlearning.org/syndicated/an-easy-way-to-create-flipped-lessons-if-you-have-a-smart-boar… […]