This Powerful Teaching Tool can be Affordable Too
There have been some great blog posts from flipped educators Jon Bergmann, Kevin Hogendorp, and Joel Speranza recently on how to make lightboards. I want to share with you how I made my lightboard for less than $100. I also want to show you how to maximise the quality of your lightboard videos by how you set up your studio, lighting and camera.
What is the Lightboard?
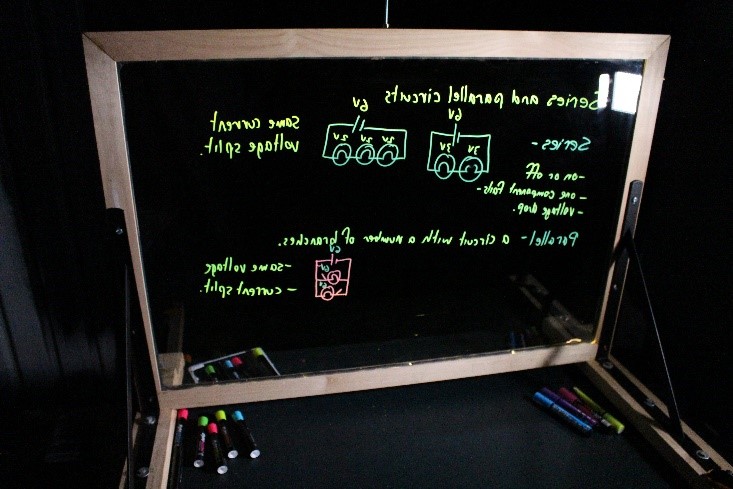
The lightboard is a piece of ultra-clear glass that is edge light with LED strip lights. The presenter writes on the lightboard with a neon marker. The light bounces around inside the glass until the light hits the neon marker writing and then exits the glass through the marker. This makes the writing really pop out against the black backdrop.
I use the lightboard to teach concepts that require formulas, calculations, diagrams and not too much text. Lightboard videos are very quick to make with minimal post production. So they are also helpful when you have a lot of videos to make in not much time.
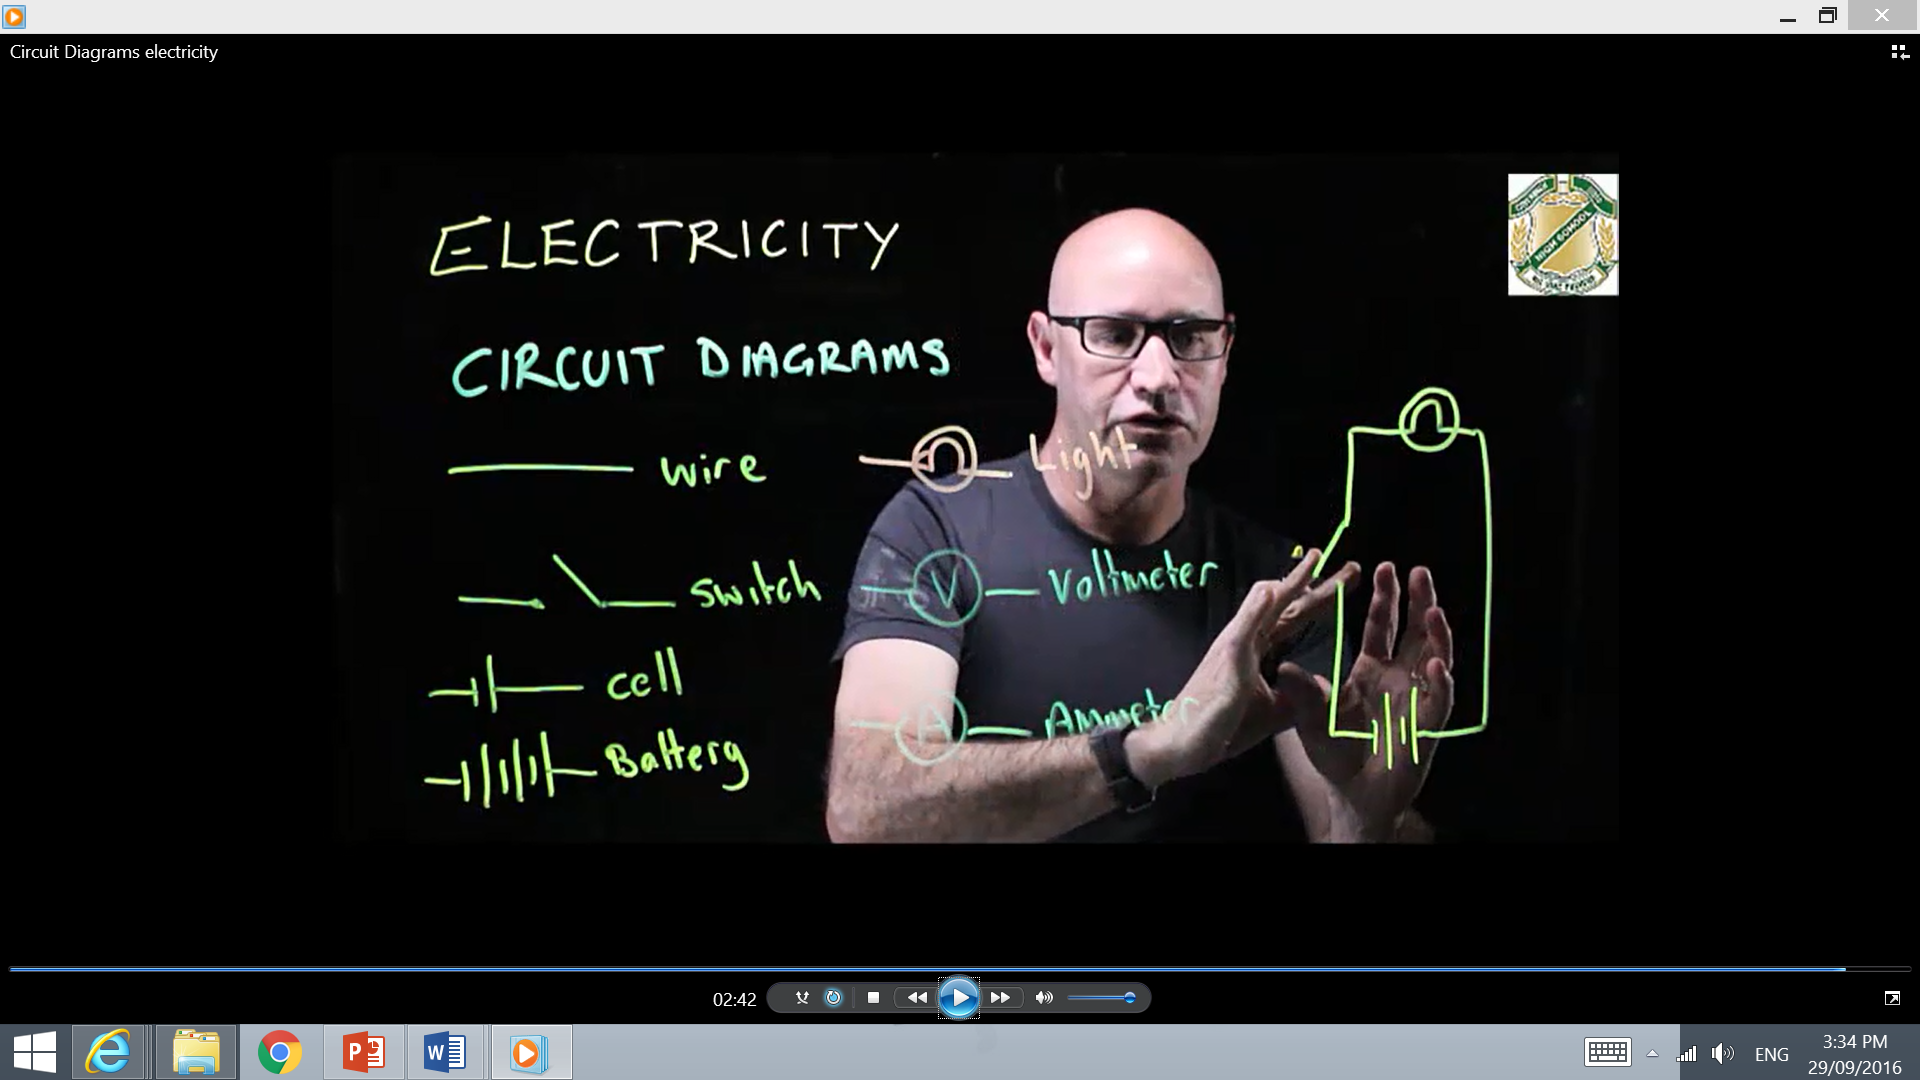
Students like learning from light board videos because the experience is similar to the teacher teaching at the whiteboard. But it is even better because the students get to see the teacher’s face.
How to make the lightboard
Materials
- Ultra-clear glass sheet from a picture framer. Glass size will depend on the size of the studio space you have. Picture glass is only 3mm and not safety glass but it works and is cheap and readily available. Alternatively, you can get 10mm glass from an aquarium maker.
- 4 Dressed pine 45mm x20mm x 1m lengths
- LED strip lights
- Wood screws
- Wood glue
- 2 lengths of pine shorts 70mmx30mm x 500mm or similar.
- 2 shelf brackets
- 6 coach screws
- Two bolts, washers and wing nuts.
Method
Lightboard:
- Use a router or bench saw to recess a channel out of the 45×20 dressed pine timber. The channel needs to be wide enough for the LED strips.
- Measure, cut and mitre the corners of the timber. Length of the timber needs to be measure from the base of the channel. Cut the mitre out from this point. (See diagram below).

- Drill a hole near the corner of one of the timber lengths to feed the wire for the LED lights.
- Lay the LED light strip in the channel and adhere with the adhesive backing. Place the LED lights top and bottom. When trimming the strip, be sure to only cut at the point indicated by the scissors.
- Glue and screw 3 sides of the frame together.
- Run the LED leads down one side of the frame and out the hole. (you will need to cut the plugs off the wires and then solder them together again)
- Slide the glass into the frame and glue and screw the final side in place.
- Solder the switches and plugs back in place. I secured the wire repairs together with electrical tape and secured the switches together with double sided tape.

Base:
Because the board is small and portable, I mount it on a desk using a portable base. To make the base:
- Secure the shelf bracket to the 70×30 pine shorts using coach screws.
- With the lightboard against the brackets, position an off cut of timber on the pin short to hold the lightboard in place (see below)
- Glue and screw the off cut in place.
- Screw a hole in the lightboard for the bolt to be inserted through the bracket and lightboard. Repeat for the other bracket.
- With the lightboard mounted in place, insert the bolts and washers through the brackets and lightboard and secure with the wingnuts.

Writing on the lightboard
I use Expo Neon dry erase markers.
Clean the board with a damp lint free microfiber cloth. Then repeat with a dry lint free micro fibre cloth. Don’t worry if you can still see smudges, you can adjust the camera settings so the smudges are not visible in the camera shot.

How to set up the studio
Lightboard videos look best if the following are achieved:
- The backdrop is totally black, (black matt backdrop, barn doors on lights, camera settings)
- The talent is well illuminated, (three lights on talent)
- The writing on the board is sharp and coloured, (Camera setting, pens)
- The glass is not visible (camera settings).
Black backdrop –
You can use a piece of black calico or muslin that will cost about $15. Or you could paint the wall matt black. You can purchase black studio backdrops from specialist camera retailers and EBay but they are more expensive. Size of backdrop will depend on the size of lightboard. My backdrop is 2m x 2m.
Lighting –
You need to light the talent but not the backdrop. I use a light on either side of the talent and also a hair light.
There are many options for lighting. I started with desk lamps and have now progressed to LED studio lights on light stands (mine are below). Don’t use flood lights as they through too much light and are too hot. The LED lights are also used for my green screen videos or are a good investment.
Use barn doors on the lights to cut the light from hitting the back drop (this makes the backdrop absolutely black in the video).
I have attached the hair light to the top of the board, alternatively, you could use a boom or secure it to the ceiling.

First, I just used simple desk lamps, now I use LED studio lights. Note the barn doors.

The hair light is secured by an arm made of ¼ inch threaded rod.
Same thread as the light and camera.


Top view of studio lighting set up.
Camera –
I use a digital SLR with an audio jack. (Cannon 700D with a 18-55mm lens) mounted on a tripod. This is an entry level DSLR and records to a memory card.
I use a digital SLR so I can adjust the aperture and shutter speed- this allows me to remove any smudges and glare from the lightboard and really brings up the colour. I set the shutter speed at 500 and the aperture at 5.0.

You don’t need to use a DSLR. Some lightboard users just use a webcam and others a compact digital camera and even a smart phone. They don’t give you the same level of adjustment.
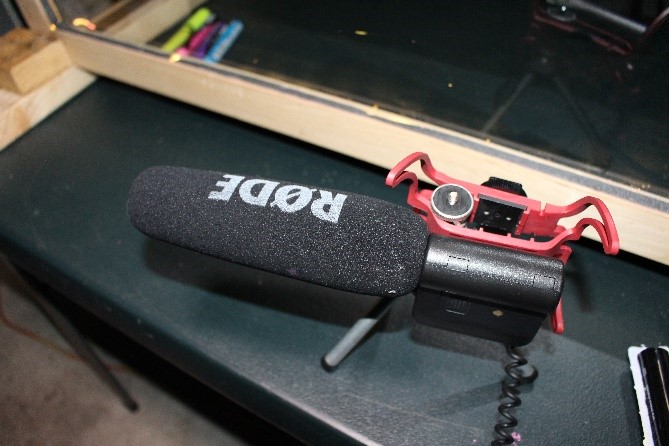
Microphone –
I use a Rode shotgun microphone. The microphone is on the presenter’s side of the lightboard so I need an extension cord to connect to the camera. I mount the microphone on a tripod out of shot.
Another option is a lapel mic. It doesn’t even need to be cordless. You can get a lapel mic from EBay for less than $30.
How to plan your video
Keep your video short. One concept per video. I try to keep my videos less than 5 minutes. If it goes longer than that, I try to cut the video into two shorter videos because there is possibly more than one concept.
Think about how you will build the concept like you would at the black/white board in class.
Think about what you will write on the board, and where you will write it.
It is best not to have a script- you don’t have a script at the whiteboard. But you might want some notes in front of the board but out of shot. Or you can look down to check notes and then cut it out in post-production (or not).
Write the title of the video on the board before starting.
You might wish to add other content to the board before starting shooting. Eg a diagram.
Editing the video in post-production
One of the benefits of lightboard videos is that they are quick to film and require minimal post production. However, as a minimum, you will need to flip the video 180° horizontally so that the viewer can read the writing.
I use Camtasia Studio for all of my post production. I flip 180° and crop the beginning and end of the video when I am entering and exiting the shot from starting and stopping the camera.
You can do more post production if you wish. This can include;
- Adding picture in picture images or diagram
- Cropping out mistakes
- Speeding up the video when writing
- Adding intro music and title sequence
- Adding other video footage
There are other products for post-production including Adobe Premier Pro.
Some cameras may be able to rotate video 180° and as a last resort, you could film into a mirror set at 45°.
Tips and tricks:
- Wear a dark coloured shirt so that writing can be read over the top.
- Try not to write over your face.
- Teach students how to watch your videos; how to watch and take notes.
I have improved my video quality progressively over the year through trial and error. It is such as good learning experience in design thinking that I have a year 12 student making my new lightboard.
You can check out some of my lightboard videos on YouTube here: https://www.youtube.com/channel/UCJVT4HVax1cbn4355e_3UWw


[…] How to Make a Lightboard for < $100 (Step-by-Step, Illustrated) https://flippedlearning.org/how_to/how-to-make-a-lightboard-for-less-than-100/ […]
We absolutely love your blog and find many of your post’s to be exactly I’m looking
for. Does one offer guest writers to write content to suit your needs?
I wouldn’t mind producing a post or elaborating on many
of the subjects you write about here. Again, awesome
blog!
We are definitely open to guest posts. Feel free to suggest a topic or two you might wish to write about. We are looking for topics that are informative and compelling for educators interested in leveraging technology in a meaningful way in their classrooms. Use the Contact Form (link on the right ->) to submit your ideas.
One really clever tip I saw is to lay out your notes in black Expo so only you can see it. It ensures you don’t write in a space where you want to add a graphic in post production. Because it’s black, it doesn’t show up in the final video.
Oh, this sounds like a cool tip. I need to make one of these boards.
What a great idea Brian. I will also use that black Expo to mark the board at the edge of the camera field of view.
Do you have to write everything “backwards” since you’re behind the glass??
Nope! You record using a camera and mirror (Steve can probably explain better, I’ll ask him to follow up).
It is possible to record through a mirror set at 45 degrees like here https://sites.google.com/site/northwesternlightboard/home but it is pretty tricky.
You are better off flipping the image in post production using software. I use Camtasia Studio and I think it is great. Adobe Premier Pro also allows 180 degree flipping and I am told that the free program Handbrake does too.
There are also some higher end cameras that will flip the file for you in the camera. Lots of options that are far better than using a mirror or writing backwards.
[…] How to Make a Lightboard for Less Than $100 (Step-by-Step, With Illustrations) by Steve […]
Excellent idea. Good to improve my next flipped
Can you tell me some vendor who can create this for me
Sorry Nirmal – we can’t (that’s why these posts are shared here, so you can do it yourself).
Do you write backwards? I feel like I missing something. Can you share a link to a video I can watch? I am pretty excited about this idea and enjoyed reading your blog.
Hi Carrie, I write normally, the camera records it backwards but I flip the file in post production. There are a number of programs that can do the post production. I use Camtasia studio. Here is a link to my youtube channel https://www.youtube.com/channel/UCJVT4HVax1cbn4355e_3UWw
There are a heap of videos about science content using the lightboard but also videos on how to set up and use the lightboard. Good luck.
What size glass did u end up using? I have plenty of space to work with so trying to get a good gauge of how big to go. thanks!
Steve’s response:
Hi Zoe,
My original, small board was 800mmx600mm. It was fine, but if you have more room, go bigger. My full size board (https://youtu.be/quCsGJ_s704) is 1600 x1200). You need a room that is about 4m x 4m. A little smaller 1200 x 800 seems to be a good compromise.
Good luck, Steve
WHATS THE CLEANING TIPS FOR THE BOARDS
Hi Nabhhiraj, I just use a dry microfiber cloth or paper towel mostly. Occasionally, I will use a wet cloth then dry it with a dry cloth. I don’t tend to use chemical sprays on the board because I worry that it will make the pens run. Good luck.
Hi Steve!
What a great work you did with this lightboard, and this great article for sharing this with everyone.
I’m writting you from Spain, where we are developing a e-learning program, and trying to build one lightboard like this for flipped learning proposes.
We have some doubts about the lighting. In particular, with the LEDs intensity. Is there any recommended intensity?
We bought white neon markers to write on the board, but with the LEDs light on, they look green in the video, and we would like to keep it white. ¿Is there any specific solution that does not involves post-production editing?
Thank you very much in advance Steve.
Best.
Hi Alvaro,
If it looks white to the eye, but green on the video, it must be the camera settings. If you use a camera that can be adjusted manually, like a DSLR, you will be able to make adjustments.
Other things to consider, the only problem with LED intensity is too low intensity. This is a problem as the light doesn’t penetrate the whole board. There are two different colours of white LED light – warm white and cool white. Warm is more orange and cool white is more blue.
Good luck. Please send me a link to a sample video if you like.
Steve
Steve,
A few questions:
What wattage do you find best for your studio lights?
What color works best for the LED Strip light? Warm white or Cool white?
Do you recommend a specific LED strip light? Looking for one that has a high intensity
Best,
Bryan
Hi Bryan,
Great questions.
These are the lights I use http://www.photo-shop-studio.com.au/studio-lighting-kits/yongnuo-video-led-light-yn-160iii-x3-3200-5500k-video-lighting-kit/.
3200-5500k is the temperature of the light colour.
You can use either warm or cool white. Cool white gives more of a purple/ blue colour to the pen colours and the warm white gives more of an orange. So they are both nice. Most of my videos are using the warm white. But this one is cool white https://www.youtube.com/watch?v=ZDsVvm0fwE8.
I don’t recommend any particular brand but do get a strip light of good quality to ensure that the connection is reliable. So spend a bit of money.
Please let me know if you have any other questions.
How come your Youtube channel doesn’t exist anymore?
Hi,
Hopefully it is just temporary. I have a new principal at school and I need to confirm with him that he is happy for me to have the channel. Hope to have it back up next week.
Hi Anders – Not sure what happened to Steve’s videos. I’ll reach out to inquire.
[…] For those looking for a challenge though many through economy or because they can choose to DIY build, there are plenty of examples on YouTube such as this one, and projects such as “How to make a Lightboard for less than $100”. […]
Can I insert digital content online while shooting. How?
Hi Jigneh – It is not practical to try and insert digital content while working directly with this lightboard, but one could always edit the video afterwards and do as you please.
Hi Jignesh, I agree with Kelly’s comment. You are best to add the digital content in post production.
Thanks so much for this extremely useful page.
I’m unclear on the relationship between the wood edges, the glass, and the LED light strip.
Do you have the LED light strip on only one of the four sides. If so, which one?
The LED light fits into the channel in the wood. Does the glass also fit into that channel? If so, is the glass resting directly on the LED lights?
When you say: “Lay the LED light strip in the channel and adhere with the adhesive backing. Place the LED lights top and bottom. ” what does the sentence “Place the LED lights top and bottom” mean?
Thanks!
Hi Neil,
Thanks for your questions. I have LED lights on all four sides. Some people only have LEDs on two opposite sides but I prefer all sides. The glass does sit directly on top of the LEDs in the channel. The glass will not damage the LEDs. On my full size board, the glass weighs 50kg and is resting directly on the LEDs. Re top and bottom, I think I was referring to only having the LEDS at the top and bottom of the board, but I really do prefer LEDs all the way around. I have got some videos demonstrating various aspects of the light board on my YouTube channel here https://www.youtube.com/channel/UCJVT4HVax1cbn4355e_3UWw?view_as=subscriber
Please let me know if you have any other questions.
Hello sir! I guess the wood slot for the led strip is larger than the plexiglass. So, how do you fill the empty space between the plexiglass and the wood?
Thank you.